Sand Simulation TP
$9.00
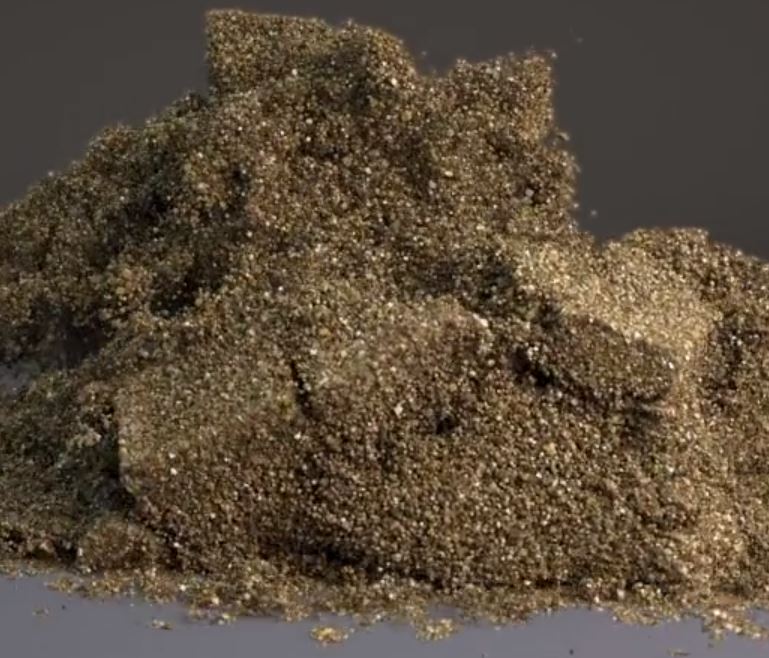
Scene and tutorial to create sand simulation using a fake metode, to do it really fast and convincing using Thinking Particles.
Description
TP Sand Solver (fast metode)
A fast way to recreate sand inside 3dsmax with TP.
After TP Sand video on vimeo: vimeo.com/62556459 I received different request for commercials doing similar effects but normally they wanted physical interaction between particles. This first video works well for disintegration stuff but not if objects need to interact between them or with other rigid bodys.
So I developed a way to make this work efficiently. Instead of using a FLIP or SPH solver I use a Fake metode.
First I drive a simulation with bullet with a procedural joint systems on it quite low res (2 to 4K boxes) This takes as much 3 seconds per frame and is very directable. Once Im happy with it I cache this first sim and I add a bunch of particles over it (around 4Milion on this examples), this particles has no physics at all, they only look around and follow the velocities from the first simulation. Based on densities and velocities they go apart to another group. This second simulation is also really fast, around 3 seconds frame for the examples you see on the video. I saw an example on vimeo using Houdini that use pretty much the same technique.
As you can see is really fast to sim, every video takes around 30 minutes to sim 250 frames for base+detail, the only problem is render times. Since Im rendering this with vray, and Thinking Particles has only instancing geometry for final render, Im always out of ram, I will handle as maximum 10M particles with a 64Gb of ram. Solution will be or move to final render, or use Frost, or pray to Edwin to implement an efficient instancing system for other renderers.
You need 3dsmax 2013 or up. And Thinking Particles 5 or 6. Open the scene and cache the “rbmaster” dynamic set. When its done activate “detailboost” dynamicset. (when you cache the “rbmaster” I suggest to have 1 substep per frame, when you run the “detailboost” go back to no substep per frame for faster feedback)
Tutorial:
Lets create first the Base simulation
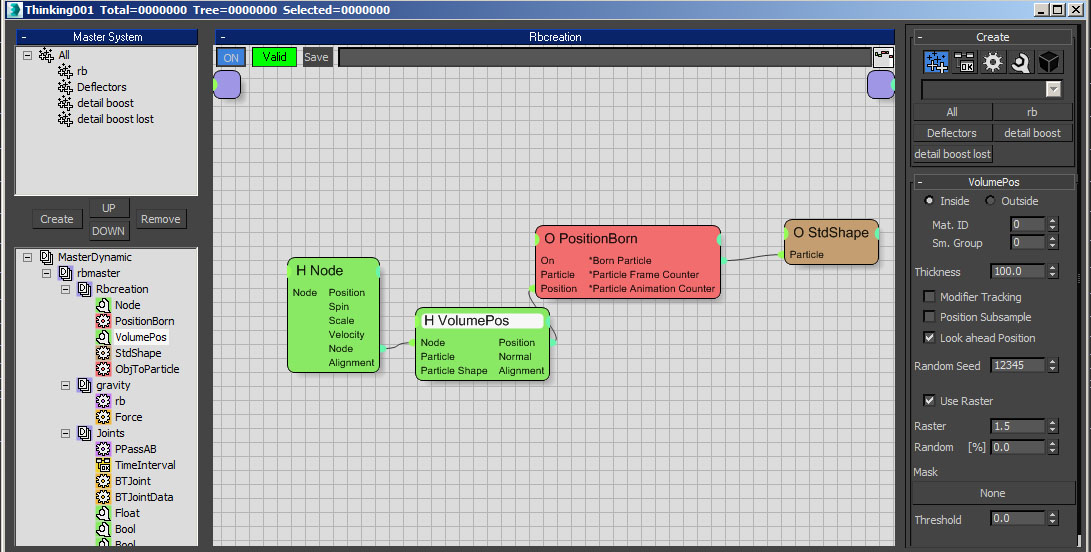
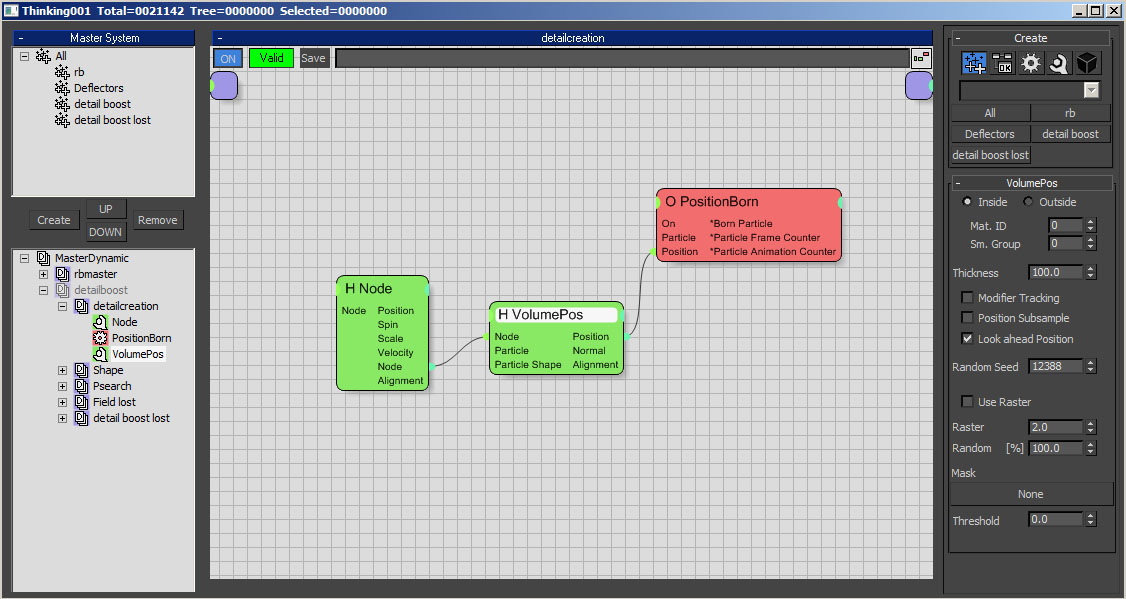
You need on your scene an object to emit particles from, can be a cube, a letter, or a teapot, you select this object with a “node” operator, read his volume with a “volumePos” and use “raster” option. With a “PositionOp” we create particles, select here “shot” as we want to emit particles only at the beginning, for number of particles add here a very high number since the total number of particles will be created with the “raster” option. Adjust raster as you wish, I will go from 2 to 5K particles as maximum we dont need a really high number of particles at this stage. We create a cube geometry shape, and use as size the same value as your raster or little smaller to dont have interpenetrations (I used 1.5 for raster and 1.49 for cube size). All this particles goes to rb group.
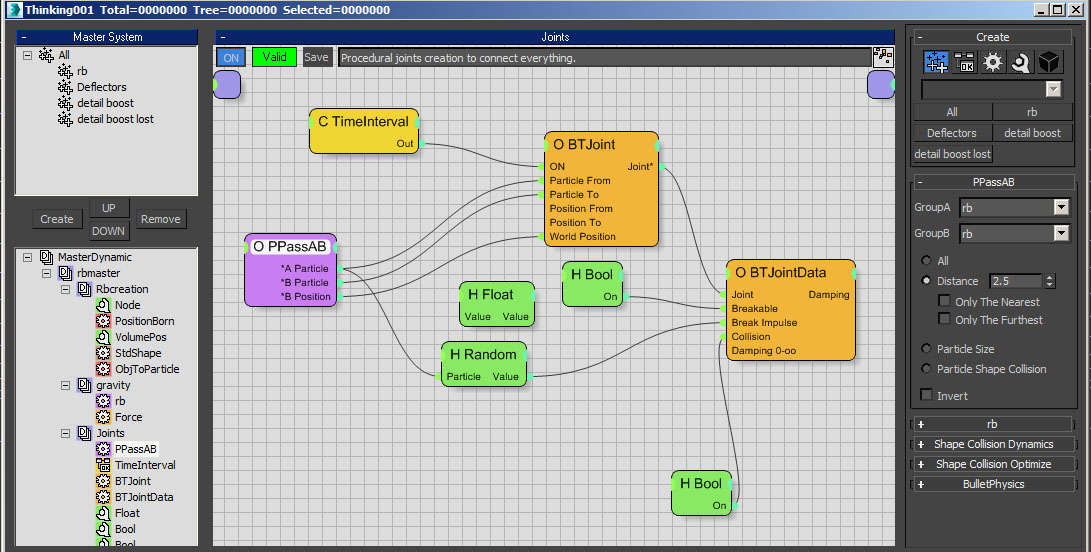
Just after we have a gravity dynamic set, I will not explain this one, its just our rb group piped into a force operator. After we have the joint dynamicset. We want to create the sensation of cohesion between particles having some bigger frags we use a PPassAB with “rb” group in groupA and GroupB and we adjust when a joint will be created using the distance parameter. With a Joint op we create procedurally the joints as you can see on the image, I create point to point joints but use whatever you want. With a BTJointData I turn on the option to break the joint when we reach a break impulse. I assign a random value per joint to have more natural feel (I use 1 to 7, but you can increase that amount if you want more compact sand).
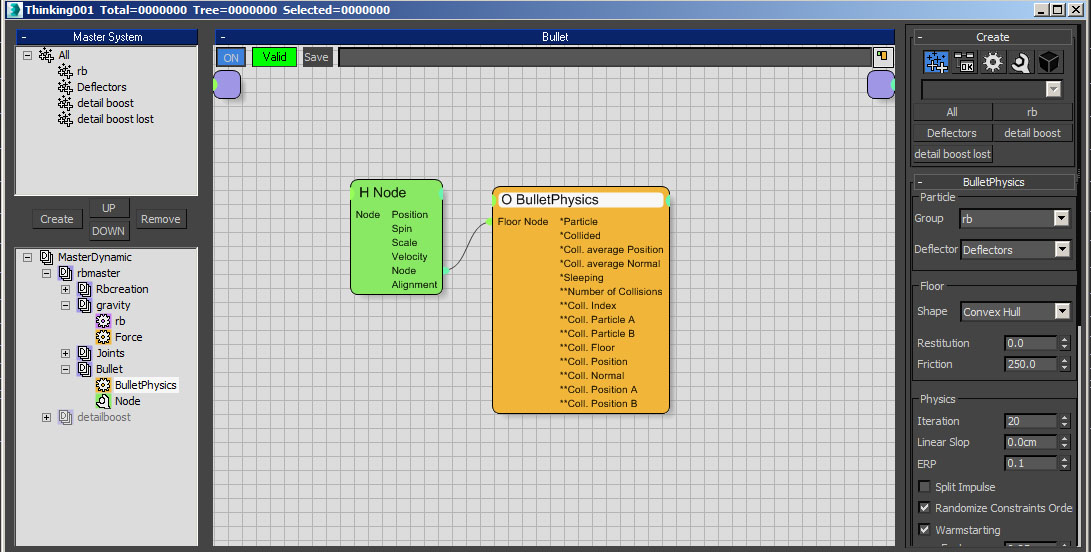
For physics I use Bullet, its faster than SC, you can use Physx if you prefer, really simple setup, I increase physics iteration to improve joints calculation, also I create a subsample per frame to dont have particles moving crazy. After you are happy you can cache this rbmaster dynamicset and go to the second part.
With the RB dynamic simulation done its time to move to next step and add detail to our simulation. We use the same box we used to voxelize our system but now we dont need to use the “raster” option. add the particles you want on “PositonBorn” Be carefull with that and moving your timeline can be slow. I will go from 2 milion to 19 milion depending your available ram for rendering and if you use krakatoa to cache or no (we will talk about that later). For tests start with 5K particles to see how react and swith to final number only for rendering.
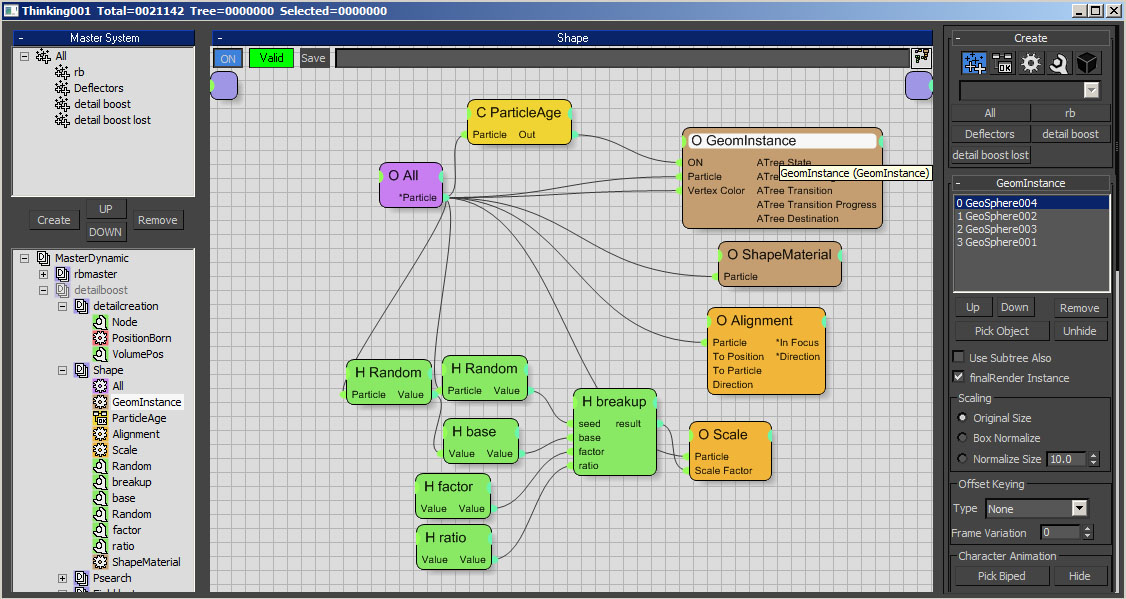
We need to mesh that, I use some very low poly goesphere with some noise on it, I used also vertex color to have some color variation on our sand, a random alignment and a breakup system to dont have so uniform sand. Note that here the group is set to All, the correct one will be to only mesh “detail boost” and “detail boost lost” groups. Also if you plan to do that in frost this step is not needed.
We need to link this created particles to our main rb simulation we did before. for this we use a Psearch and use the found velocities to drive our new detail particles. Also when the detail particle is alone (low found density) we will send them to “detail boost lost”.
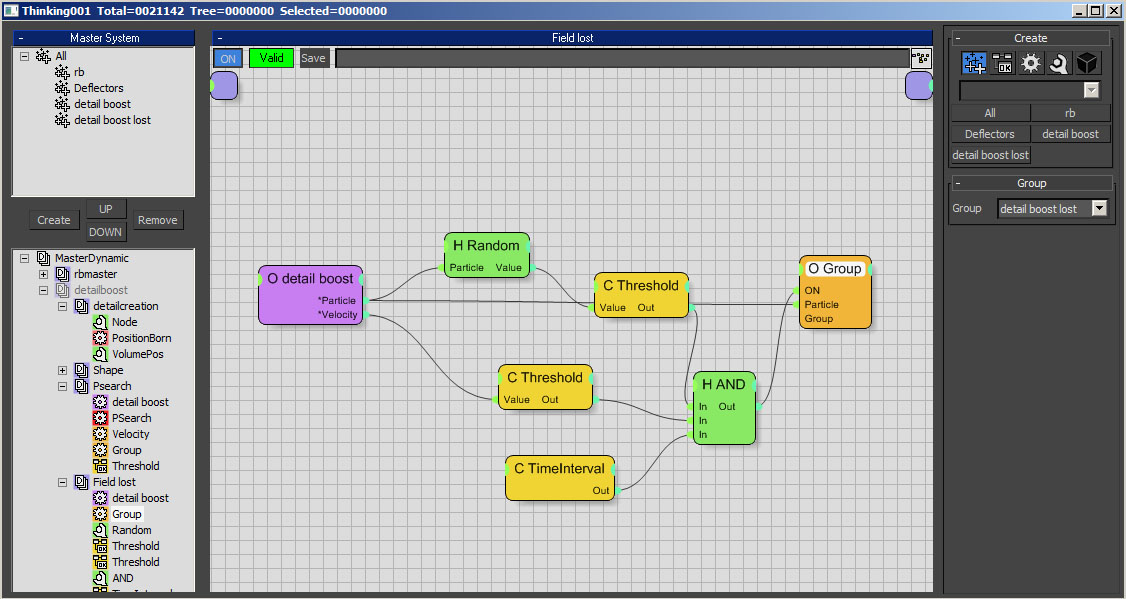
Also I send particles to “detail boost lost” by time. I use a “random” helper with “per frame activated, and with a threshold and always if the particles are moving I send this to “detail boost lost”. This step is not really necesary, only use if you wish and adjust to your needs.
This “detail boost lost” has only gravity and deflectors, add all deflectors you need. Since its not physics based the system will run fast and some particles will interact more closely with your geometry.
Thats it! is quite an easy system and as you see is really effective. If you use a lot of particles I will suggest to use krakatoa to cache them and after mesh it with frost. Will save you a lot of ram and faster render times since you will not need to load all the geometry.
